# On-premises Moku Compile
On-premises Moku Compile is an alternate to Moku Cloud Compile that allows users to develop and maintain their custom code on a local computer/server without the requirement of an internet connection. After successful compilation, the bitstreams can be deployed onto the Moku.
All Moku Compile modules are either VHDL or Verilog entities that provide the architecture of the custom entity. For examples of what this can look like, refer to the examples pages. Once you have such an entity, you need to build and deploy it to your Moku. This guide will show you how to build the bitstream using On-premises Moku Compile.
Subscription and license requirements
To access On-premises Moku Compile, you need to subscribe to the Enterprise tier of Moku Compile, for all Moku devices, and obtain a license to deploy bitstreams using Custom Instrument+, for Moku:Pro and Moku:Delta. Base and Premium tier users can use Moku Cloud Compile.
# Step 1 : Install Vivado and MokuCLI package**require Internet connection
On-premises Moku Compile allows users to develop and compile custom HDL designs on a local server without requiring an internet connection. To enable offline compilation, installation of the AMD Xilinx Vivado Design Suite is required.
Please download Vivado version 2022.2 from Xilinx Downloads. (opens new window) During installation, select either the Standard or Enterprise Edition, depending on your Moku device and requirements. Please note that the Enterprise Edition requires a valid license.
| Hardware platform | FPGA family | FPGA part number | Vivado Edition |
|---|---|---|---|
| Moku:Go | Zynq-7000 SOC | xc7z020clg400-1 | Standard |
| Moku:Lab | Zynq-7000 SOC | xc7z020clg484-3 | Standard |
| Moku:Pro | Zynq UltraScale+ MPSoC | xczu9egffvc900-2 | Enterprise (opens new window) |
| Moku:Delta | Zynq UltraScale+ RFSoC | xczu47dr-fsvg1517-2-e | Enterprise (opens new window) |
After the successful installation of Vivado, note the directory path to the Vivado software on your local machine or server.
Additionally, you must install the MokuCLI utilities package, which is the command-line interface (CLI) used to run On-premise Moku Compile. Download the MokuCLI package (opens new window) and follow the steps in the MokuCLI reference to install the package.
Compatibility of Vivado versions.
The Moku FPGA is built using Vivado version 2022.2. Using a different version may not work correctly on certain designs, especially designs with IP cores. For best results, use the same Vivado version.
# Step 2 : Configure the synthesis settings
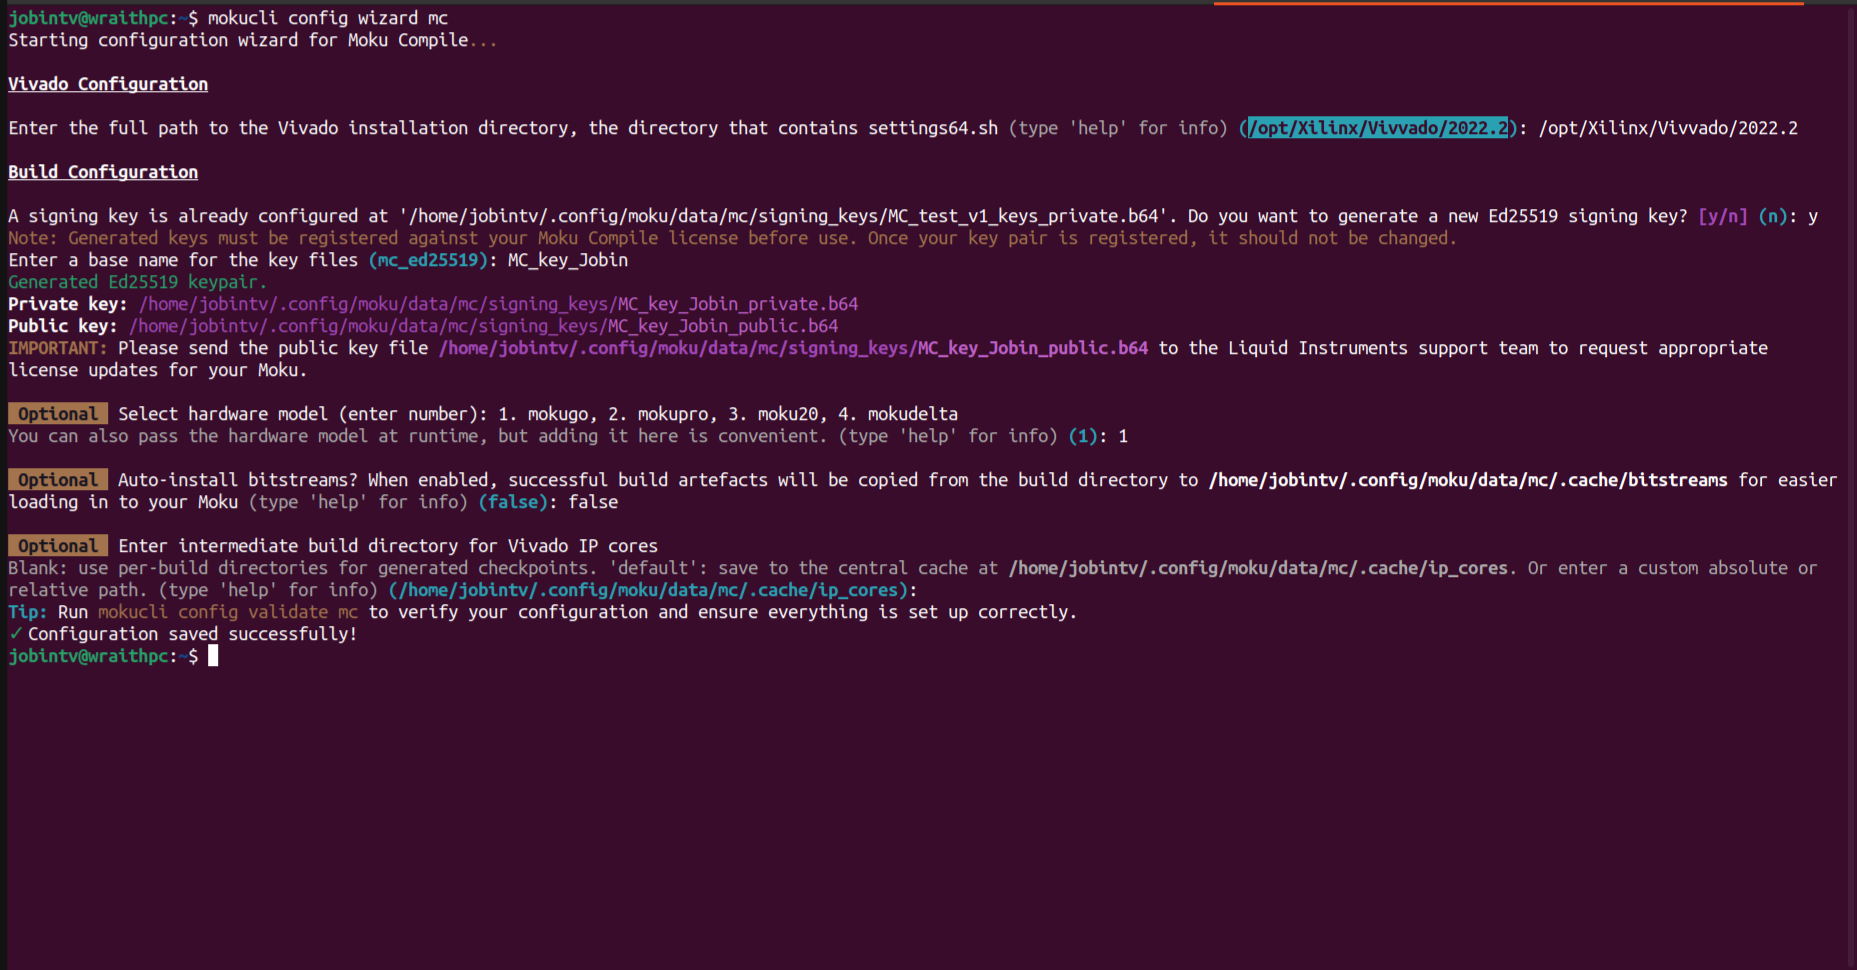
In the terminal run mokucli config wizard mc and enter the prompts with the
following information:
- Xilinx Vivado installation directory where the settings64.bat or settings64.sh is located and contains the "bin" subdirectory.
- A signing key for the bitstreams for verifying the license of your Moku devices. For first-time users of the On-premises Moku Compile, you need to generate a new key and email this information to us as shown in Step 3.
- Choose the Hardware model (Moku:Delta, Moku:Pro, Moku:Lab or Moku:Go) on which the bitstreams are going to be used.
- Enable/Disable Auto-install bitstreams. If enabled, a cache folder is created and the synthesized bitstreams are copied here.
- Intermediate directory path for storing the IP Core files for reusability. This stores the generated artefacts of compiling IP cores so that subsequent builds do not rebuild for every compilation. If the IP core information is not required, you can store them in a cache memory location instead.
This step is for initial setup and is not required again unless either the Vivado installation, account details and Moku device for deployment is changed.
# Step 3 : Validate signing key for On-premises Moku Compile**require Internet connection
To use On-premises Moku Compile, you must provide the following information to Liquid Instruments Support. This information is required to authorize access to download Moku toolchains and deploy bitstreams on your Moku devices.
- Email address used to login in Moku Cloud Compile.
- Signing key that is generated in the previous step.
- Moku devices with their serial numbers.
After this information is received, you will receive a confirmation by email that your Moku device and On-premises account have been linked. If you have not created an email address, a new account will be created and the account information will be shared with you. You will use this credentials in the next step. If you are using your Moku devices offline, we can send you the license files upon request. Download the license files and then upload it onto your devices (opens new window).
Unauthorized access
You cannot download the necessary toolchains, to compile your design, without the verification of your account. Devices not linked to your authorized account will not be able to deploy compiled bitstreams.
# Step 4: Login and install your toolchains**require Internet connection
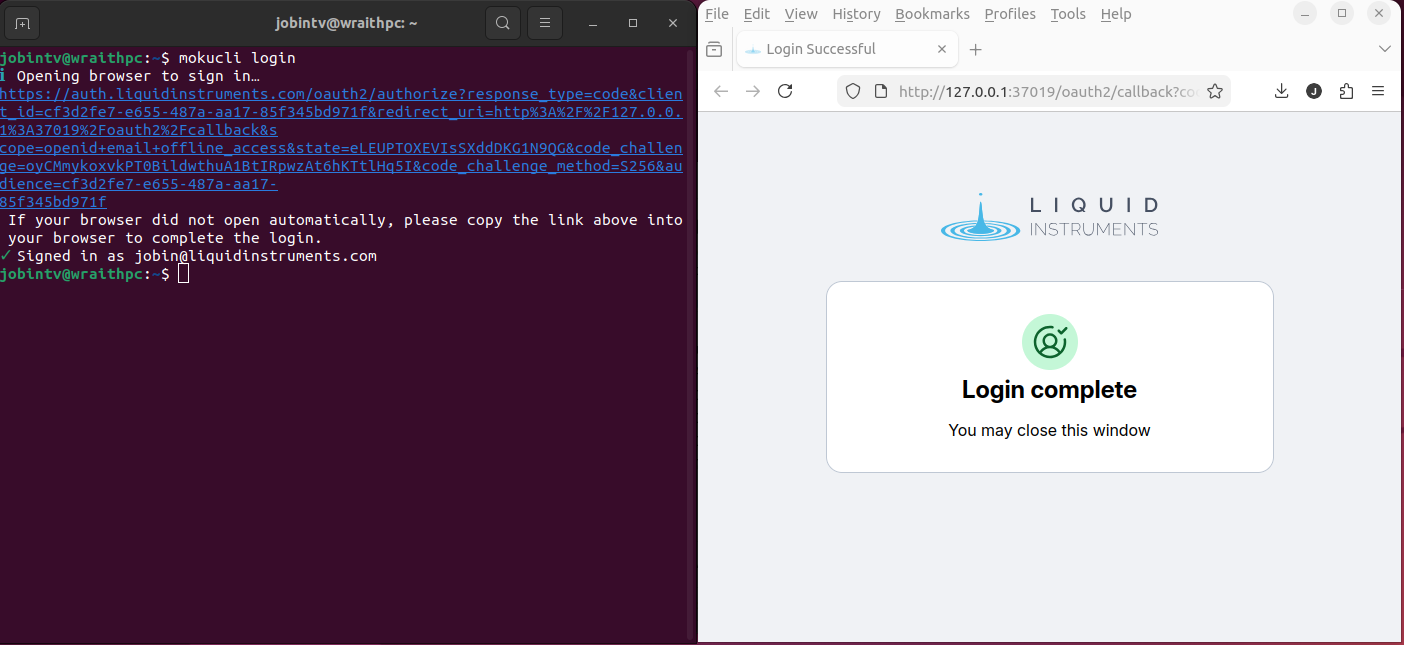
To install the toolchains locally, first login to Moku Compile by running
mokucli login in your terminal. Complete the sign-in process via the browser.
Ensure the login is completed with the email address attached to the signing
key, as provided in Step 3.
Once logged in, return to the terminal. If successful, your terminal will show
✓ Signed in as youremail@company.com.
In the terminal, run
mokucli mc install <MokuOSversion> --hw-version <mokudevice> to install and
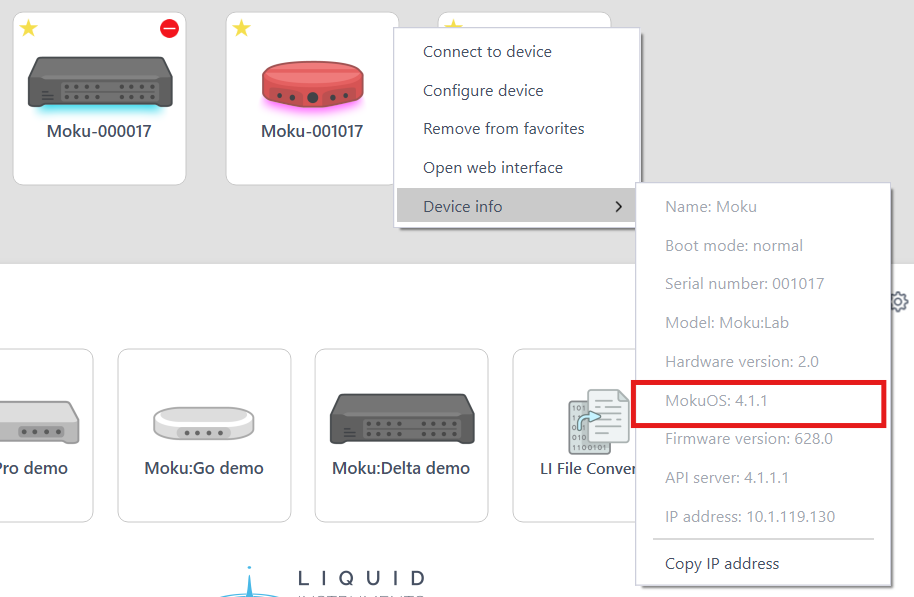
set the toolchains for your Moku device and MokuOS version. The MokuOS
information can be found using the Moku App. On the Moku Desktop application,
right-click on your Moku, select Device info and note the MokuOS version.
On iPad, you can see this information by long-pressing on your Moku.
After this step, the setup is complete and the computer does not need to be connected to the internet to compile builds. This step is used again to download and install the latest toolchains for your Moku device.
# Step 5: Creating a project
Create a project folder and include all the files to describe the custom design. This is the source directory whose files would be used for synthesis and compilation.
Inside the project folder, add VHDL(.vhd), Verilog(.v), IP Core (.xci) and/or Coefficient (.coe) files. To avoid unpredictable synthesized behavior, ensure the wrapper defined in only one file in the source directory.
# Step 6: Build your Design
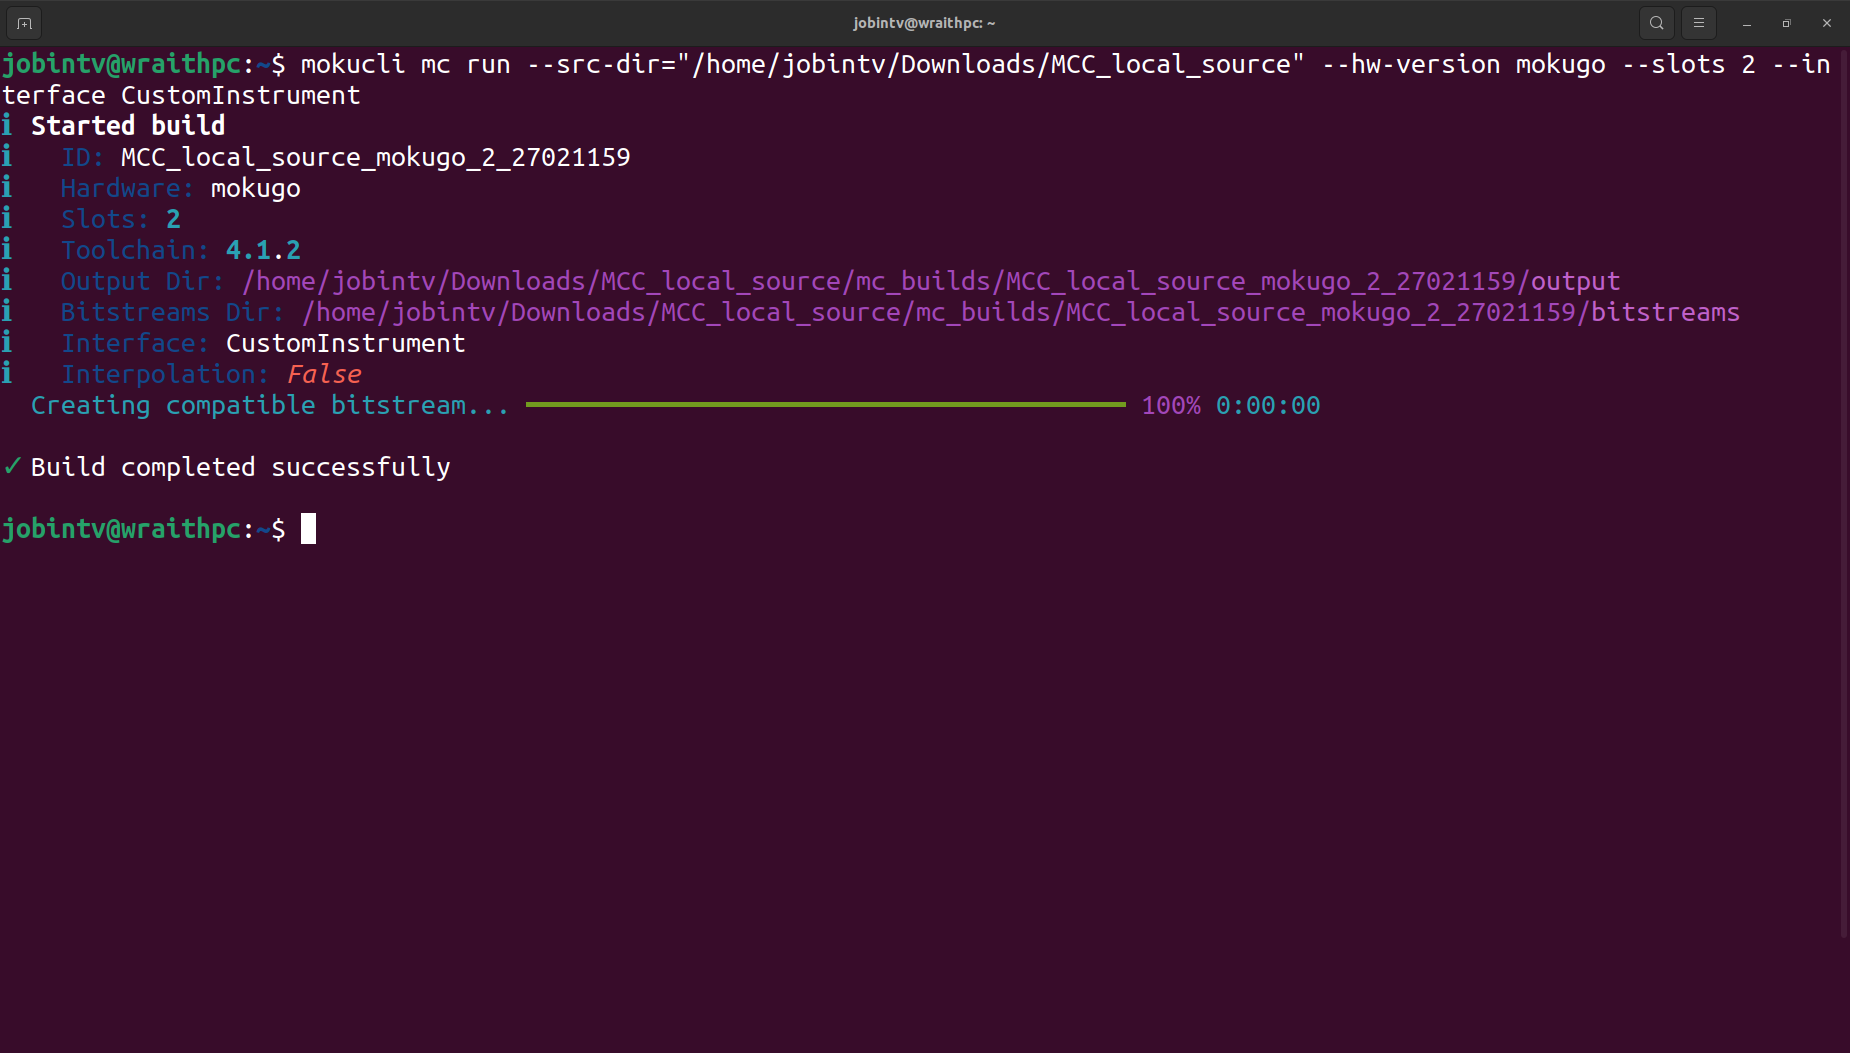
When the project code is complete and in the project folder, run the following command in the terminal to build the project
mokucli mc run --src-dir "path/to/src/directory/" --hw-version <Moku device> --slots <number-of-slots> --interface <wrapper-name>
Where
"path/to/src/directory"is the source directory, noted above, of the project folder,hw-versionis based on the Moku device you are using,slotsrefers to the number of slots in the Multi-Instrument Mode you are deploying the bitstream to, andinterfacerefers to the name of the wrapper used for defining the custom design.
Mismatch in runtime parameters
Using parameters that differ from the operating parameters may yield unsuccessful compilation or deployment.
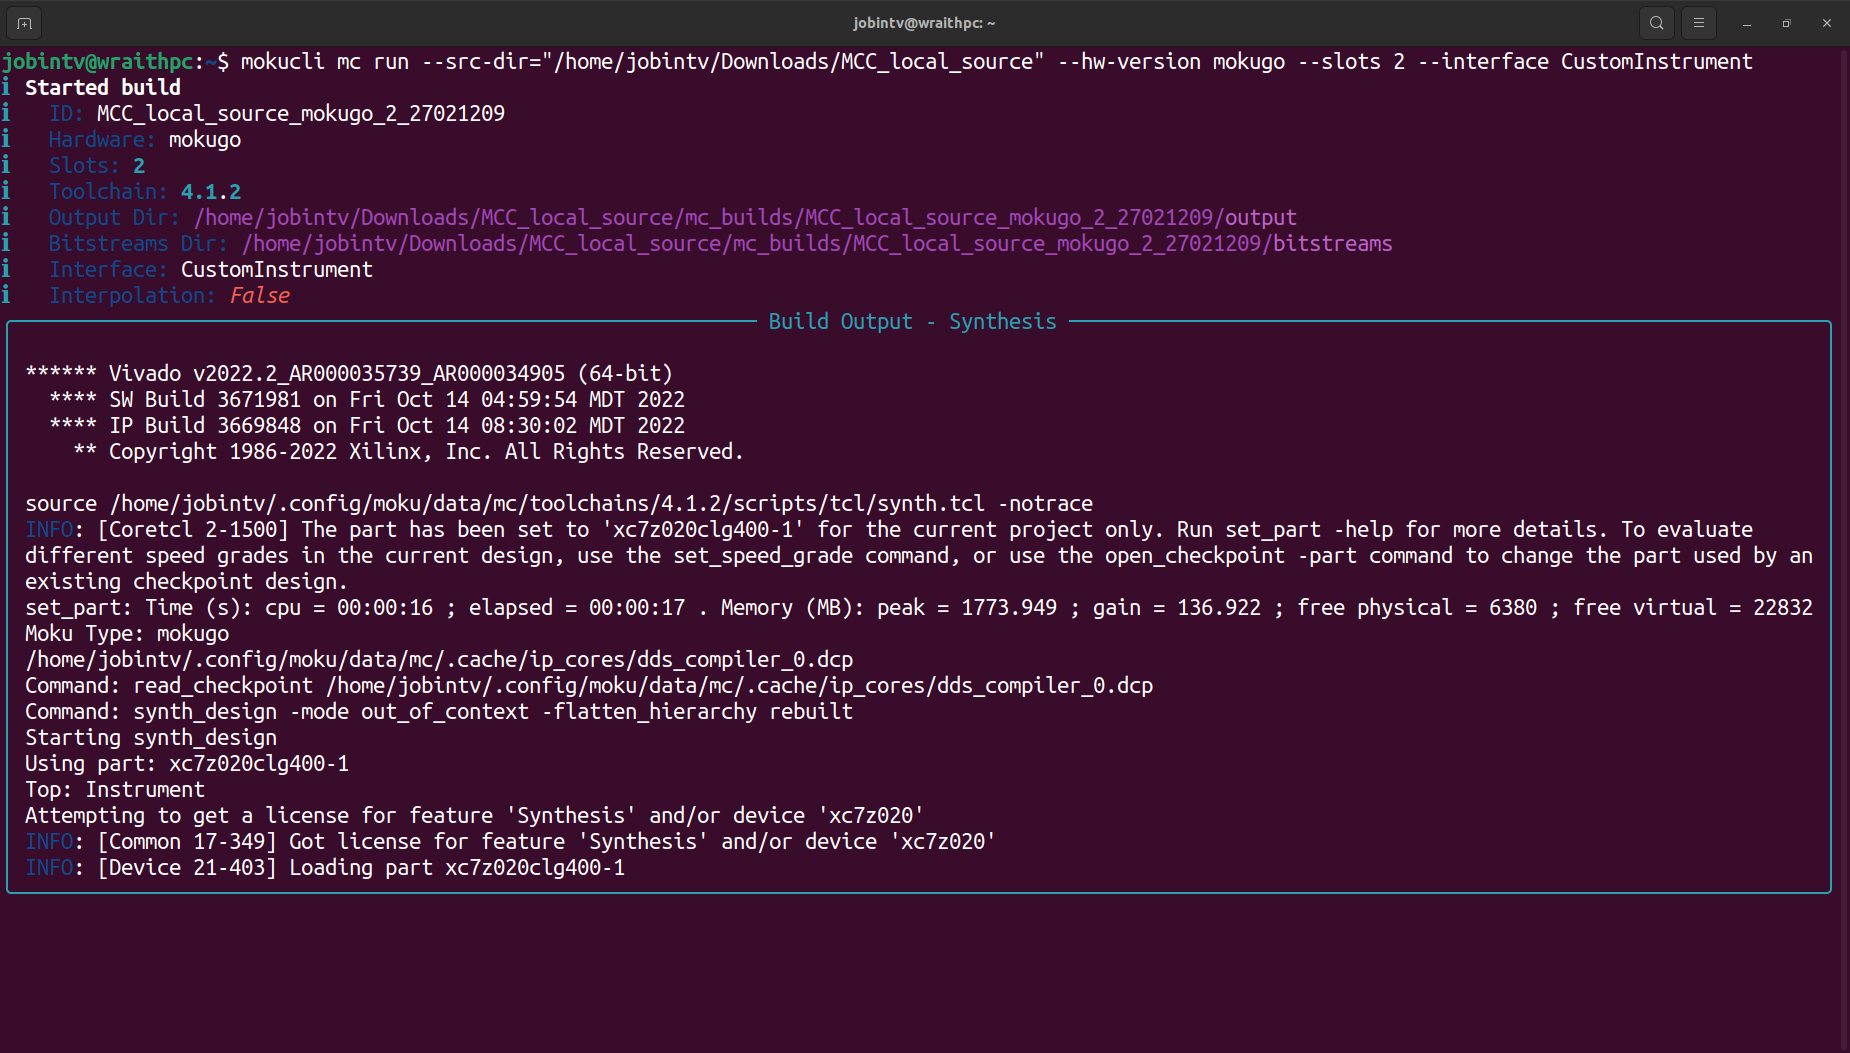
As the build compiles, the terminal prints the current compilation log. The build time depends on the hardware platform and project complexity. A simple project on Moku:Go will build in 3-5 minutes while Moku:Pro designs may take up to half an hour.
Compatible MokuOS and Bitstream File Extension
The generated bitstreams will be either in .tar or .tar.gz depending on the target MokuOS. The extension .tar is for MokuOS 3.3.1 versions onwards. The extension .tar.gz is for MokuOS versions from 3.0.0 to 3.2.0.
Once the build is completed, reports and logs are generated in a sub-directory within the project folder under "outputs". If the compilation is successful, the bitstreams would also be available and generated in the "bitstreams" folder. Deploy the bitstream to your device and implement your custom design.